Unit 1: Git-ing GitHub Setup
Welcome to Unit 1 👋
This unit we are going to briefly cover GitHub, READMEs, Markdown, and GitHub Profiles. This is a shorter unit to get the Fellowship started. You may even already be familiar with some of these concepts.
Unit 1 Lecture Video
GitHub
GitHub is a website for you to backup your code. It makes it easy for you to collaborate on projects with others. You should treat it like a portfolio for your work as a software developer.
Create an account at https://github.com/signup. Optional, but highly recommended to also sign up for the Student Developer Pack!
Note: Since you will have this for a long time, use your personal email, not your school email.
README.md
Every project you make should have a README. The README is the first thing that people will see when they look at your project on GitHub; it's your opportunity to make a good impression!
Project READMEs should usually have the following:
- Project description
- Screenshots or gifs of the project in action
- How someone can get started with the project
- Who has built/contributed to the project
READMEs are written in a language called Markdown.
Markdown
Markdown is a markup language to add formatting elements to your text. The .md file extension indicates that the file is written in Markdown.
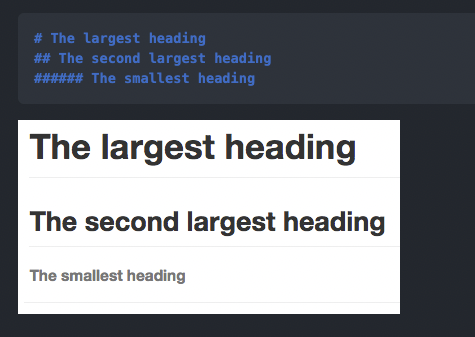
Headings
Headings are the titles of your sections. To create a heading, add one to six # symbols before the text. The more # symbols you use, the less important that heading is.
Text Formatting
We can also do some text formatting, just like in Word.
| Plaintext | Markdown |
|---|---|
| **Bold** | Bold |
| *Italic* | Italic |
| ***Bold and Italic*** | Bold and Italic |
| ~Strikethrough~ | |
| `code` | code |
| [Link](htttps://studentcouncil.ics.uci.edu) | Link |
| - List Item 1 - List Item 2 - List Item 3 | • List Item 1 • List Item 2 • List Item 3 |
Newlines
Newlines are often the trickiest for markdown beginners.
To create a newline, you have two options:
- Add 2 spaces to the end of the previous line
- Add an extra newline
| Text | Markdown |
|---|---|
This is a line.But it doesn't have 2 spaces on the end. | This is a line. But it doesn't have two 2 on the end. |
This line DOES have 2 spaces. So it's on a newline! | This line DOES have 2 spaces.So it's on a newline! |
This has an extra newline So it works too! | This has an extra newline So it works too! |
Images
You can also include images in a README! There's a few ways to do this:
- Reference the URL of an image
 - Reference a file in your folder
 - Or just copy+paste a picture in the GitHub text editor in your browser!
+ More!
There's WAY more that you can do with Markdown. Take a minute to look through GitHub's Markdown Guide and checkout all the cool things you can do with Markdown!
Can you figure out how to add quotes or multiline code?
GitHub Profile README
Did you know that GitHub profiles can have a README too? This is a special hidden feature on GitHub that will help set you apart from other accounts!
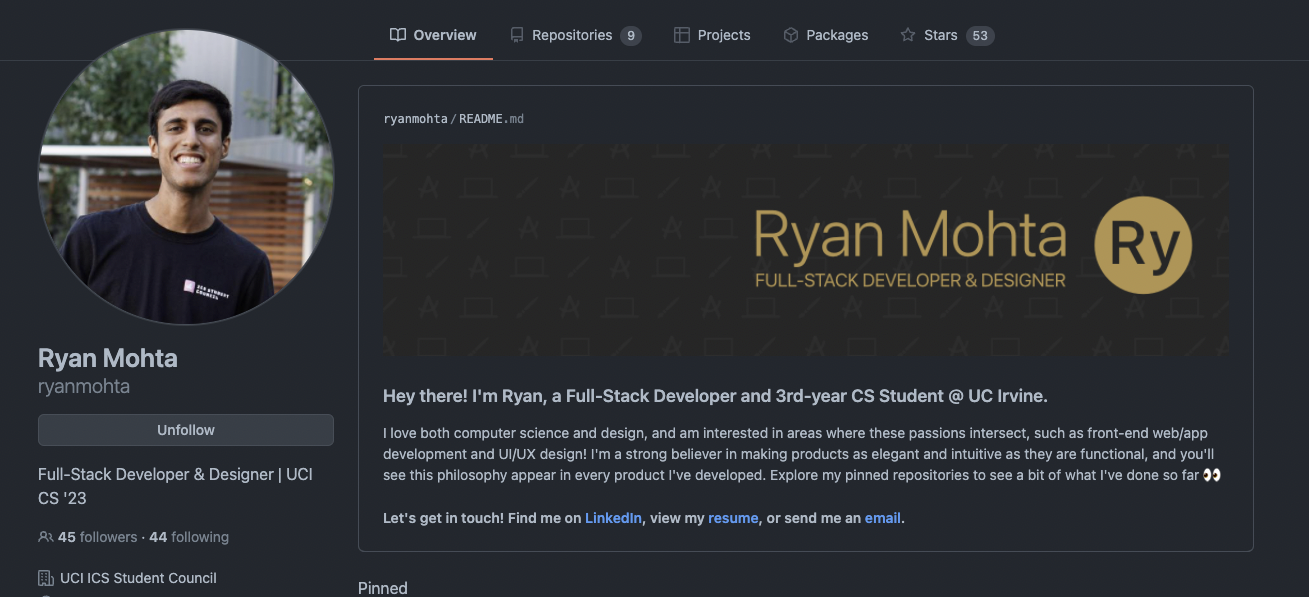
To create a GitHub Profile README, you just need to create a repository with the same name as your username and add a README.md file to that repo.
Some people get really fancy with these. Here are a few Awesome GitHub Profile README Examples.
Assignment
Your assignment for this unit is to create a GitHub account and add a GitHub Profile README. Already have one? Great! You can relax or continue to improve it.
Here's a guide on creating your GitHub profile README.
Deliverables
Required Tasks
- Create a GitHub Account
- Create a Profile README with:
- A header
- At least 300 characters
- At least one instance of Bold or Italics text
- At least one external link
Optional Stretch Goals
- Add a name, description, and profile picture to your GitHub account
- Add an image in your Profile README
Submission
Complete the Google Form. Please use your UCI email.
External Resources
- README
- Markdown
- GitHub Profile README